If you want your installs to look clean and last for years, you must learn how to seam artificial turf properly. Poor seams lead to callbacks, complaints, and lost referrals. However, when done correctly, seams become invisible and long-lasting.
In this guide, you’ll learn how to seam artificial turf, when to use seam tape vs adhesive, and how to avoid common failures.
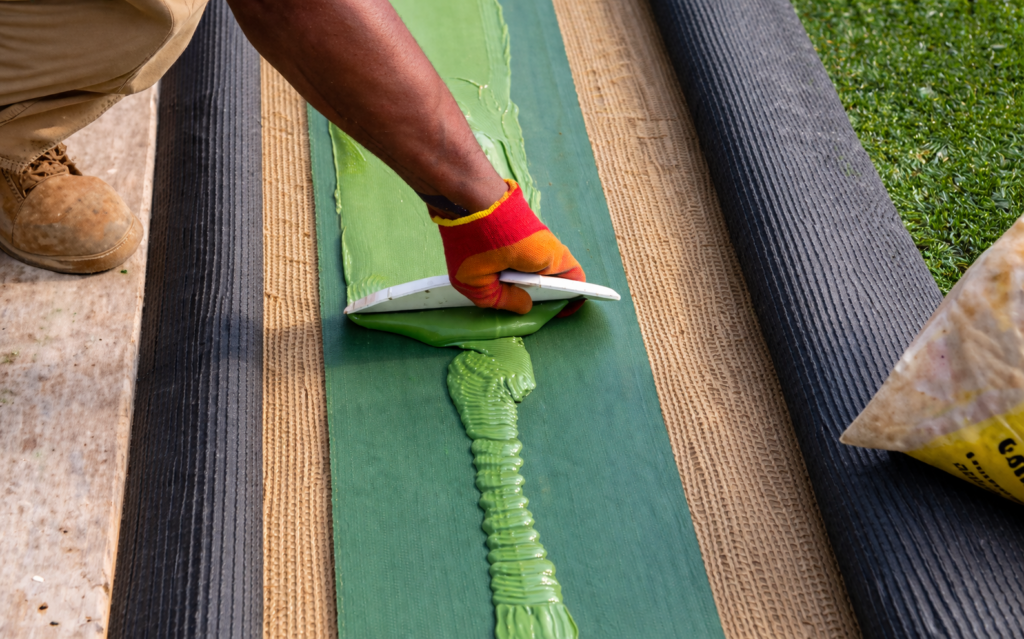
What Adhesive Is Used to Seam Artificial Turf?
The best option to seam artificial turf is polyurethane-based adhesive.
Why?
- Strong bond to turf backing
- Flexible under heat and expansion
- Water-resistant (ideal for Florida)
- Long-lasting under traffic
Additionally, professionals always use seam tape + adhesive together. Using one without the other leads to weak seams.
Why Artificial Turf Seams Fail
Most failures happen for preventable reasons. For example:
- Weak Adhesive Bond – Cheap glue or uneven application
- Poor Base Preparation – Movement under the turf
- Incorrect Seam Method – Skipping tape or using nails
- Weather Conditions – Heat and moisture impact curing
Therefore, proper technique is critical.
Seam Tape vs Adhesive: What’s the Difference?
Seam Tape (Structure)
- Holds turf alignment
- Creates a bonding surface
Adhesive (Strength)
- Bonds turf to tape
- Prevents separation
The correct method to seam artificial turf is:
Seam tape + polyurethane adhesive = professional standard
When to Use Each Method
- Residential installs: Tape + adhesive
- High-traffic areas: Reinforced adhesive
- Edges: Nails (support only)
- Repairs: Remove old glue before reapplying
However, never rely on nails alone for seams.
Step-by-Step: How to Seam Artificial Turf
- Prepare and compact the base
- Align turf grain direction
- Cut clean, straight edges
- Lay seam tape evenly
- Apply adhesive consistently
- Join edges carefully
- Apply pressure evenly
- Allow proper cure time
Initial set: 1–2 hours
Full cure: ~24 hours
Additionally, humidity can extend drying time.
When to Use Adhesive (Glue-Only Method)
Adhesive can also be used without tape. However, this method works best for small seams.
Best uses:
- Tight seams or repairs
- Low-stress areas
On the other hand, large installations need tape + adhesive for strength.
| Method | How it Works | Best For |
|---|---|---|
| Tape + Adhesive | Tape under seam with glue | Most installations |
| Adhesive Only | Glue directly on base | Small repairs |
How to Keep Artificial Turf From Moving
To keep your turf stable:
- Compact the base properly
- Secure edges with nails
- Use strong seam bonding
- Add infill for weight
As a result, your turf will stay locked in place.
Common Turf Seaming Mistakes
- Using cheap adhesive
- Skipping seam tape
- Overusing glue
- Rushing cure time
- Poor alignment
Therefore, attention to detail matters.
Pro Tips for Better Turf Seams
- Control your glue line
- Work in smaller sections
- Adjust for weather conditions
- Train your crew properly
- Inspect before leaving
Explore Turf USA Products
Conclusion
Learning how to seam artificial turf correctly separates average installers from professionals. Strong seams improve durability, appearance, and customer satisfaction.
Ultimately, better seams lead to fewer callbacks and more referrals.
Contact us
sales@turfusa.com
888-909-5679
